 Lightning Aura Components
How to use lightning out on Heroku
Recently I had to explore a use case of exposing a User interface that present some Salesforce data on a public facing website.
Given the Lightning component was already developed I wanted to explorer ways to re-use the component ‘as is’ somehow.
Lightning => Out
Lightning out technology allows to expose a lightning app on different client sites which are outside Salesforce domain.
For this example I used Heroku (Owned by Salesforce but actually hosted on Amazon Servers).
To get started on Heroku I used this great and simple repo :
Credit to @dcarroll – this repo is great and actually doing much of the heavy lifting here and this example simply shows how to use this repo with a bit more context to the use case.
This implementation depends on another framework which allow us to get the session key from Salesforce using JavaScript :
- ForceJS framework allow us to integrate with Salesforce.
Let’s get started…
- Clone the Repo in your file system folder using
git clone 'https://github.com/dcarroll/heroku-lightning'
- Run the following command in the project folder to install all dependencies described in your project.json file
npm install
- Install Salesforce lightning design system (optional but reccomended)
npm install @salesforce-ux/design-system --save
Make sure your slds icons displays correctly after deploy to your site.
The following lines are to workaround an issue I was having – slds icons did not displayed and this was the only way I found to solved it.
Quick workaround to display slds icons:
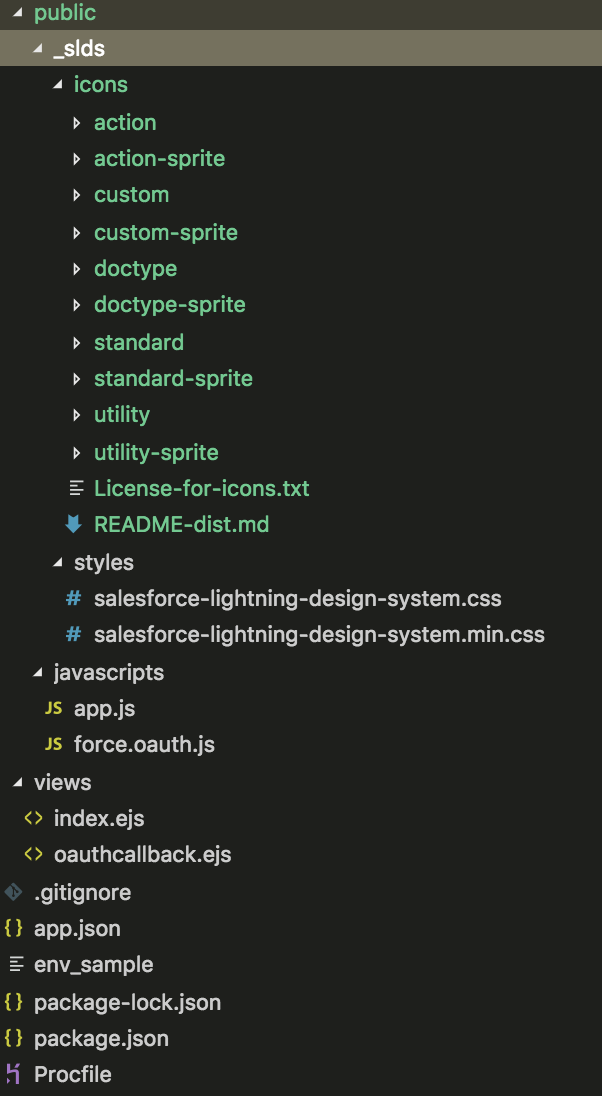
- Copy the icons folders from node_modules/@salesforce-ux to my public folder under `_slds` folder.

We will need to change few files but that will be easier to go into your org and first setup your connected App.
Setup Connected App to enable OAuth connection to Salesforce
- Go to setup > App Manager > New Connected App
- Enable OAuth Settings
- Callback URL = https://YOURAPP.herokuapp.com/oauthcallback
- The important permissions will be :
- Access and manage your data (api)
- Provide access to your data via the Web (web)
- Access and manage your Chatter data (chatter_api)
- Provide access to custom applications (visualforce)
- Grab your Consumer Key and Consumer Secret
Create Lightning App
- Extend the
ltng:outAppinterface and declare the dependency references - Build a Lightning App to wrap your component:
<!-- <c:YourApp> -->
<aura:application access="GLOBAL" extends="ltng:outApp">
    <aura:dependency resource="c:myAppComponent" type="COMPONENT" />
    <aura:dependency resource="c:YourEvent" type="EVENT" />
</aura:application>
Setup your Website Page to Display the Component
Set Credentials for authentication
Open the project folder in your IDE and change the following on file : env_sample and populate your Consumer Key and Consumer Secret from previous step
- APPID = Consumer Key
- LOAPP = c:YourLightningAppName
Setup the domain of your Salesforce org
- Change the the domain url on the file =>
index.ejs- https://YOURDOMAIN.lightning.force.com/lightning/lightning.out.js
Call Lightning Out in order to display your component
- Add the following to file =>
app.js
setupLightning(
    function() {
    //Create Lightning Component using lightning out (chatter)
     $Lightning.createComponent("forceChatter:feed", { type: type, subjectId: subjectId}, "chatterFeed");
 }
Deploy to your Website
- Heroku –
git push heroku master
Example Repository in Github:
Resources


